
Beautiful, selected furniture is the basis of a cosy and comfortable home. However, the final touch is revealed through the choice of decorative elements. Just as you express your character and preferences through your clothing, you also reflect your personality through the decorative objects you choose for your home. And what could be better than giving your private little realm a new look and reinventing yourself again and again?
The good news is that this is possible with very little effort. Just by changing a few elements, you can change the entire mood of a room.
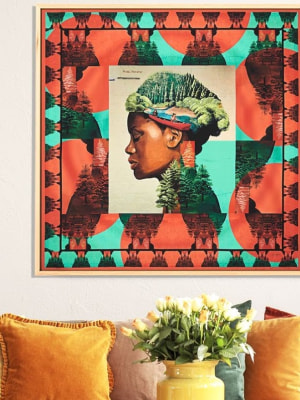
Adding new wall art to a space is a great way to give each of your rooms a unique personality. You don't always have to dig deep into your pockets to achieve this. One easy way to update your walls is to simply pick your favourite silk scarf and transform it into a piece of art you can hang anywhere in your home. Silk scarves usually come in 90 x 90cm or 140 x 140cm. This way you can choose between sizes, depending on your space. If you feel like you want to start smaller, you can also start with a 53 x 53cm bandana.
There are many different ways to put a scarf on the wall and I wanted to share two simple ways you can achieve this look. Fine silk on the wall radiates a special warmth and shimmers differently and unexpectedly from every angle and incidences of light.

Method 1:
For the first, super-simple solution, you can use self-adhesive magnetic dots that you attach to your wall, then clamp your silk scarf between them... et voila! And of course, don't forget to iron the scarf first to achieve a more even look!
Depending on the size of your scarf, you will need around 4-6 magnetic dots. You can also get magnetic strips to cover larger surfaces. This is a great way to quickly change your decorations and also switch between different scarfs.
Method 2:
The second way to transform your silk pieces into wall art is to sew your scarf onto a larger fabric, which you later attach to a frame. I love to work with this method to create this type of wall art that can be displayed in various fine art galleries. So we recommend this highly, as the result will give your scarf a more professional overall look.
We start by sewing the scarf on to a black fabric. This should be dimensionally stable and not too thin - we take black tapestry or Molleton with at least 350 g/m² basis weight. It takes a little practice to sew the smooth silk all around the edges and without wrinkles on the fabric, but it also can be fun and therapeutic.

It is important to leave enough fabric overhang all around the edges - 5-10cm depending on the frame size. This is needed to pull it over the stretcher, stretch it and fasten it on the back with a stapler.
You can get the stretcher frame in art supply stores. It is best to measure the silk scarf exactly beforehand, because not every scarf will be the same. With a little practice you will get it right. The most important thing is to keep the scarf in tension so that the silk can shine without wrinkles.
Also, why not try a floating frame. This could be the crowning touch for your silk scarf art work. You can get floating frames from most art supply stores. Either in standard sizes or customized to your wishes.
Now, the only thing left to do is to find the perfect place for your art piece! Sit back and enjoy your new silk scarf art.
Shop the article


Read more
REPORTS
Bring Your Silk Scarves To The Walls
Beautiful, selected furniture is the basis of a cosy and comfortable home....

REPORTS
How Interior Design Helped Me Through a Pandemic
I launched my interior brand at the end of 2019 with the aim of bringing a...

REPORTS
Discovering Sustainable Leather
The journey of IMESMERI started in Istanbul in 2019. Before founding the...

REPORTS
From Paint To Pattern: The Journey Behind Launching My Swimwear Brand
As a teenager I used to draw vibrant watercolour paintings. My paintings...

REPORTS
We Went To A Birthday Party As Friends And Left As Business Partners
The idea to start our shoe brand Ops&Ops came to us at a friend’s...