Emily Carter is an award winning British designer and illustrator specialising in hand illustrated silk accessories, stationery and furnishings. The collections incorporate themes from flora, fauna and scientific illustration to create surreal and unique illustrations and designs.
The purpose of this guide is to introduce you to drawing, and how to use her particular specialism, pen. She will be using a snake as an example for this explanation, but this method is easily transferrable to any object.
1. TOOLS
To begin your drawing, you will need the following tools:
- 2B pencil
- 4B pencil
- Rotring pen or fineliner (0.3-0.5)
- Eraser
- A4/A3 paper – 200gsm+
- Ruler
2. OUTLINE & MEASUREMENTS
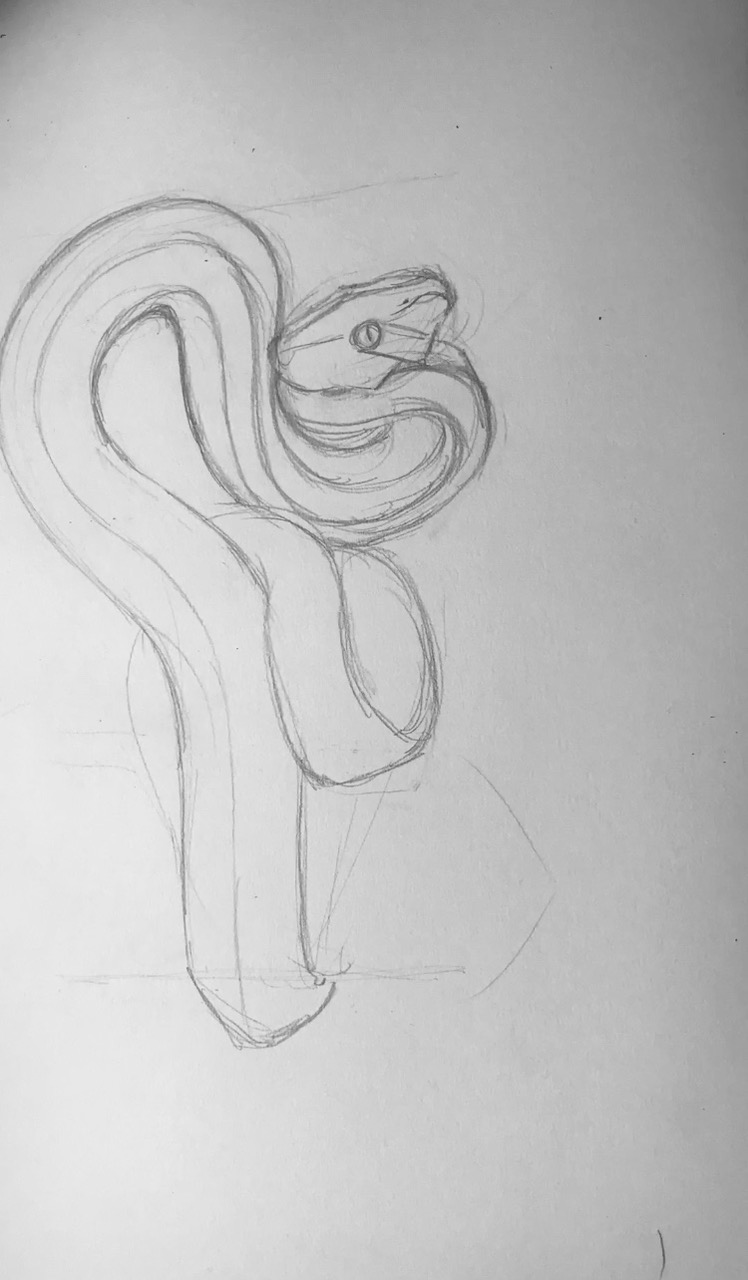
The first step is to find the centre of your page, both horizontally and vertically, and identify the shape of the object you’re drawing. Lightly sketch this outline with your 2B pencil – this will be your guide throughout the rest of the drawing to ensure your perspective remains accurate.

3. FORM & UNDERDRAWING
From your outline, you can then begin to fill in the form of the object with your 2B pencil. Keep your pencil light using line only (no shading), and mark the main features of your object. Don’t rush this, as your form outline will be your foundation and point of reference for the rest of the drawing – it’s the most important part.
4. SHADOW
Once you have accurately drawn your object with pencil, you can begin to identify the darker areas and shadows. This is where we change medium and use pen, and lightly highlight the darkest sections of the object, to give the drawing depth, contrast and perspective.
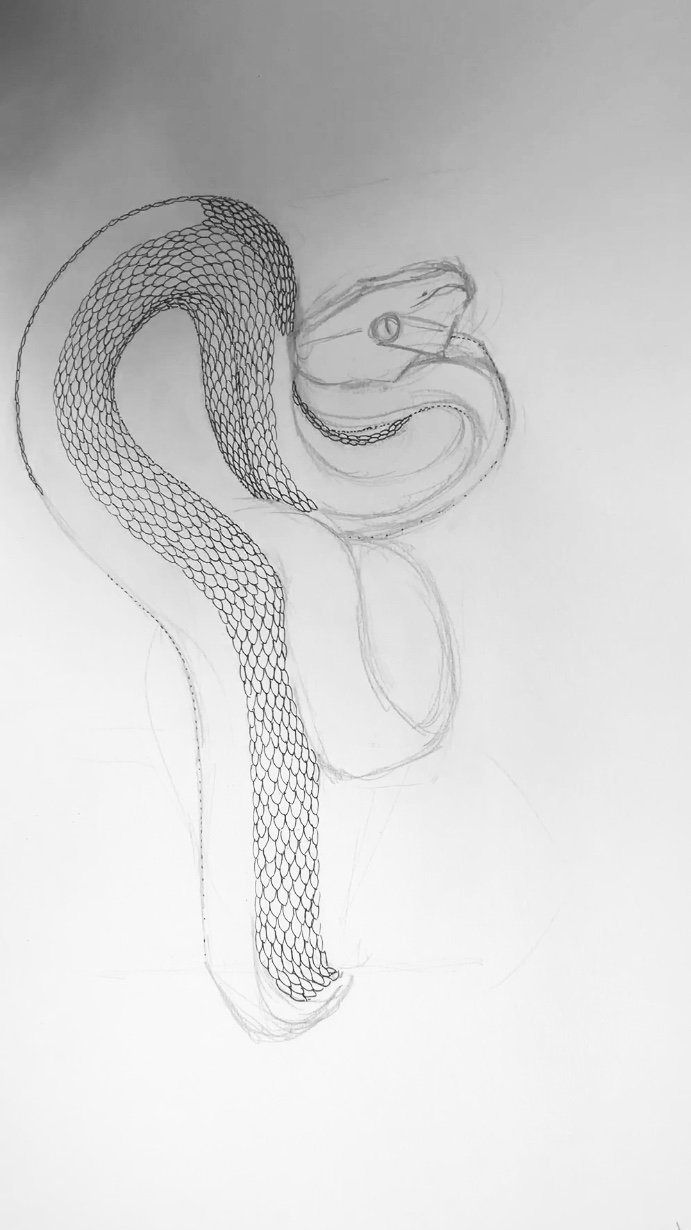
5. TEXTURE
The next step is to identify the texture. Even if the texture isn’t visible perhaps from a photograph, almost everything in the natural world, bar a few exceptions, will have some form of texture. The key is to capture that in your drawing, as it’s essential in bringing your art to life.
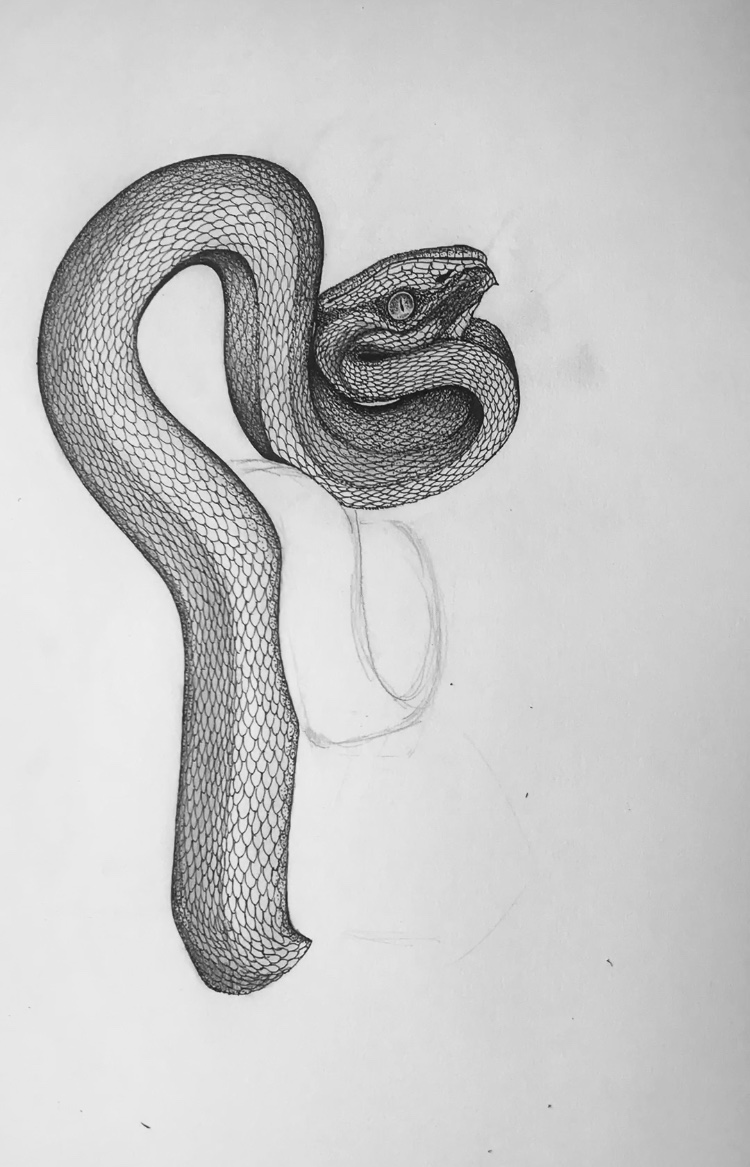
So to take the snake for example; it has scales. The scales may not be individually visible in photographs, but they do exist and need to be included. My suggestion would be to find a macro shot of the texture for reference, before proceeding.
The scales in your drawing need to be drawn individually, which is time consuming but can also be therapeutic. The easiest way to do this is to keep moving your paper, so that you’re drawing the scales towards you. This makes it much faster than drawing them away from you, especially when using pen.
Remember to change the scale shape from circular to oval as you move outwards down the sides of the snake; this will help to lift it out of the page.

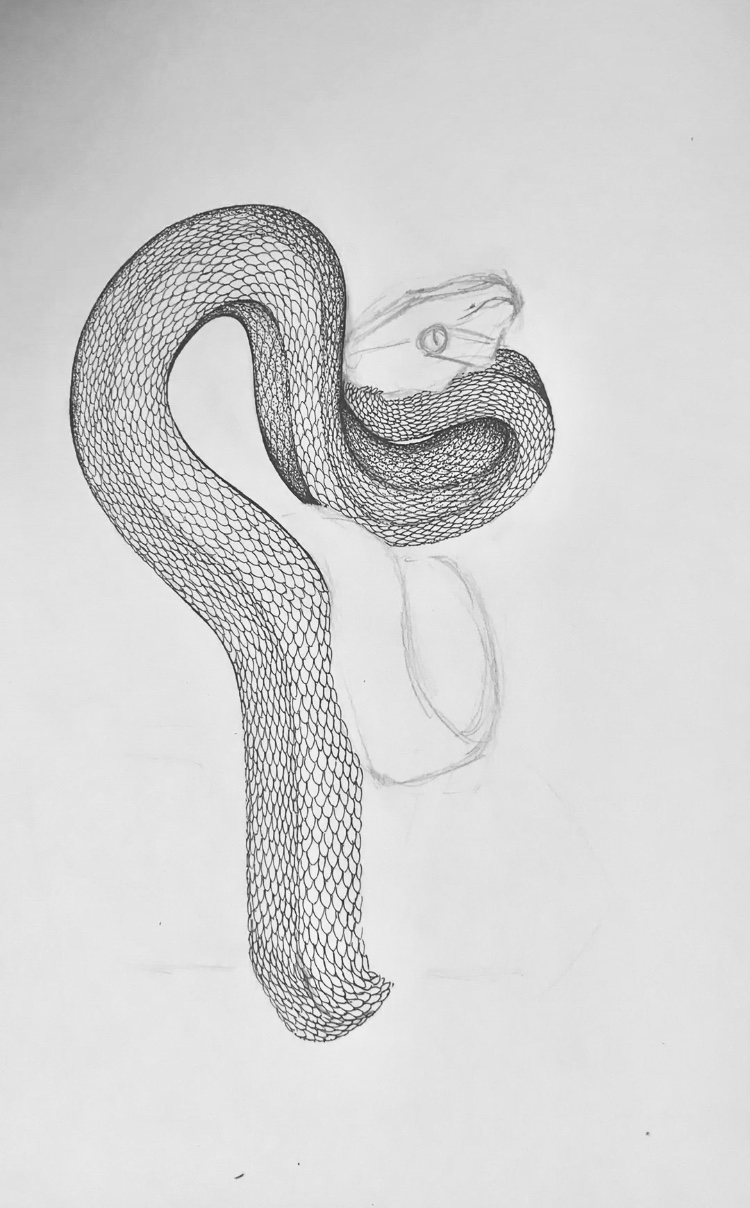
6. MARK-MAKING
Once your scales are complete, your drawing will have its desired texture, but will still look flat on the page. This is where mark-making and pointillism come in. With pen the process changes here, as you can’t shade like you do with a pencil, so you have to use other techniques to create shading. Mark-making is the first, where you use line and shapes to generate contrast. This makes for a more graphic style, but is just as effective in bringing the drawing to life.
7. POINTILLISM
We will be using pointillism in this tutorial, which is a series of graduated dotting to create shade. Again this is time consuming, but creates a delicate effect.
Return to the highlighted sections you identified in Step 4 and lightly dot outwards. After about 10 minutes, you should begin to see some shadow. Remember that contrast is essential in pen drawings; don’t overdo it. Keep some areas almost white, and others almost pure black. This creates more depth and perspective. Also remember to consider which direction the light is coming from. You’ll create a much more dramatic and realistic contrast if you keep the light in the same direction.
8. SHADING
Once you have created shading using pointillism, I normally draw a small amount of underlying shadow using a 4B pencil. This is just to create a smoothness and unity between the dots.
9. DETAILS
I always suggest leaving the details until last. So for this example, the snakes head is the most difficult part so I return to this at the end. The most important part of any animal, is the eye. Without an accurate eye, your animal won’t look real.
For the details I will go back over them, using the same steps that I followed for the body. So using my 2B pencil, I’ll accurately draw the form of the head and eyes, which again I spend a long time on, followed by highlighting and texture with pen. I leave a gap for the eye, and continue with pointillism until the head is complete.
For the eye, draw the slit for the pupil, and lightly dot using pen - making sure to leave a white gap around the pupil, and the outside of the eye and always leave a completely white section at the top of the eye, as this is where it catches the light.

10. ERASING
Now that your drawing is complete, you can go back and remove all of your guidelines using an eraser, and finally add in some light shine marks along the snake body.
Shop the article


Read more
INSPIRATION
The Seasons Write The Menu With Margot Henderson
New Zealand born, Margot Henderson OBE is a chef, restaurateur, and cookery...

INSPIRATION
Three Ways Your Life Will Change for The Better in 2022 (According To A Trend Forecaster)
Robbie Hodges is editor and forecaster at TrendWatching.

INSPIRATION
Curating Exhibitions: Walking, Talking, & Trees
Charlotte Call is the Founder of Sapling, a gallery in Mayfair exploring the...

INSPIRATION
Our Q&A with Ravinder Bhogal, Food Writer & Co-Founder Of Jikoni, The UK's First Independent Carbon Neutral Restaurant
Ravinder Bhogal is a food writer and Chef Patron and co-founder...

INSPIRATION
Our Q&A And Recipe From London Based, Korean-American Chef, Judy Joo
Judy Joo is a London based, Korean-American Chef and the founder of Seoul...